Self-braided braids - step-by-step braiding of complex braids
Lovers of complex braidswith unusual varieties of hairstyles, based on braided braids. Step-by-step weaving will help to quickly understand the nuances of this exciting hobby and will present the joy of creativity to the master. A few rather unusual braids and their variations will be useful to every home hairdresser.
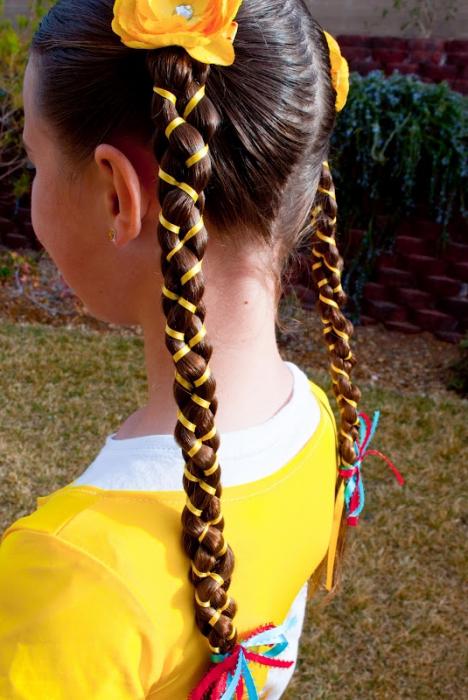
Step by step weaving braids - photo of unusual technique "rosette"

- Separate with a comb the round zone on the vertex - it's like a small skullcap. We tie a tight tail. Hair from this zone will be used when we begin braiding braids.
- Step-by-step weaving consists of the following stages: we divide the parietal part of hair by a straight parting, we form spikelets first from the left side. Look carefully at the photo. It clearly shows that for weaving a spikelet on one side we use loose strands, and from the opposite right side we take from the tail. It is required several times to do this rather complicated element to feel how thick the strands should be so that the hair is enough for the entire woven "rosette". Repeat all this and for another spikelet, work in a mirror image. Try to achieve full symmetry.
- After you finish braiding the braids(step-by-step weaving is described above), connect all the hair either to the common braid or to the "tail". This hairstyle is very elegant and many mothers love to make it to their little daughters for the holidays. She looks great with bows and flowers.
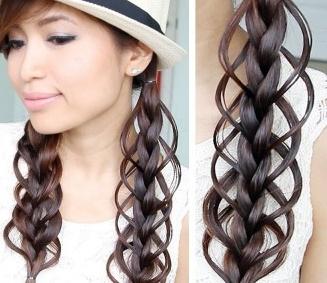
Original weave braids - turn-based weaving on the basis of 4 strands

This hairstyle looks like a masterpiece of hairdresser's art. The secret of its perfection is that four strands are used for such a weaving, while very thin.
- Divide all hair with a vertical parting into two parts. We will work alternately first with one side, and then in a mirror image with the other part.
- Tend the spikelets, crossing very small strands, as shown in the photo. A roller must be formed. Strands gently pull, starting from the beginning of the weaving to the end.
- Continue braiding the braid from the four locks. When finished, fan the pigtail to give it a three-dimensional appearance. Secure the end with an elastic band.
- Repeat all operations similarly for the otherside. At the end, both braids are tucked together, joining a common low knot. Due to weaving, the hairstyle looks very unusual - it seems that it is made by a famous stylist.
Complex plaiting braids
Step-by-step instructions may not be necessary for skilled craftsmen - it's enough to look at the photo of the model and it becomes clear that these two braids are weaving on the basis of classical technology.